
The North America Nebula offers the perfect starting point for amateur photographers wanting to learn astrophotography.
This cosmic wonder provides an ideal target for beginners learning to photograph deep-sky objects.
From choosing the right camera settings to planning the perfect shooting night, it covers all the essential steps.
This blog explains everything they need to know about capturing amazing images of this nebula.
To find out how to photograph this nebula and create your own beautiful space images, continue reading the blog.
What is the North America Nebula?
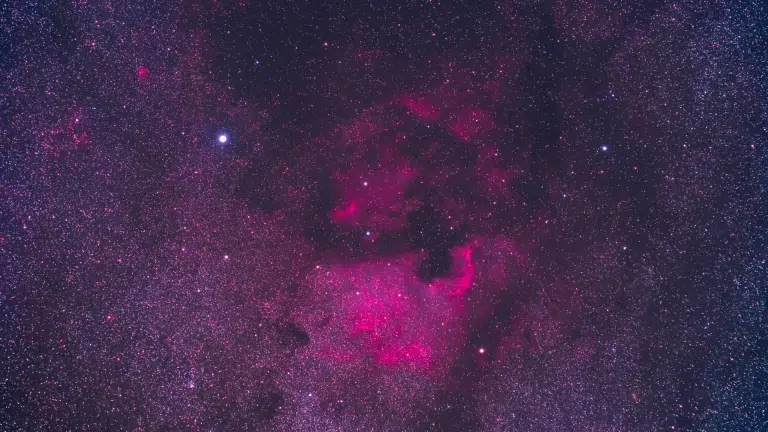
The North America Nebula is an emission nebula located in the constellation Cygnus. Scientists know it by several catalog numbers, including NGC 7000 and Caldwell 20.
This cosmic cloud is named after its resemblance to the North American continent when viewed through telescopes.
The nebula spans roughly 120 by 100 arcminutes across the sky, making it quite large compared to other deep-space objects.
Located approximately 1,500 to 1,600 light-years away from Earth, this glowing cloud consists mainly of hydrogen gas.
The bright red colors come from hydrogen atoms getting energized by nearby hot stars. Active star formation happens throughout different regions of this nebula.
Why It’s a Popular Astrophotography Target?
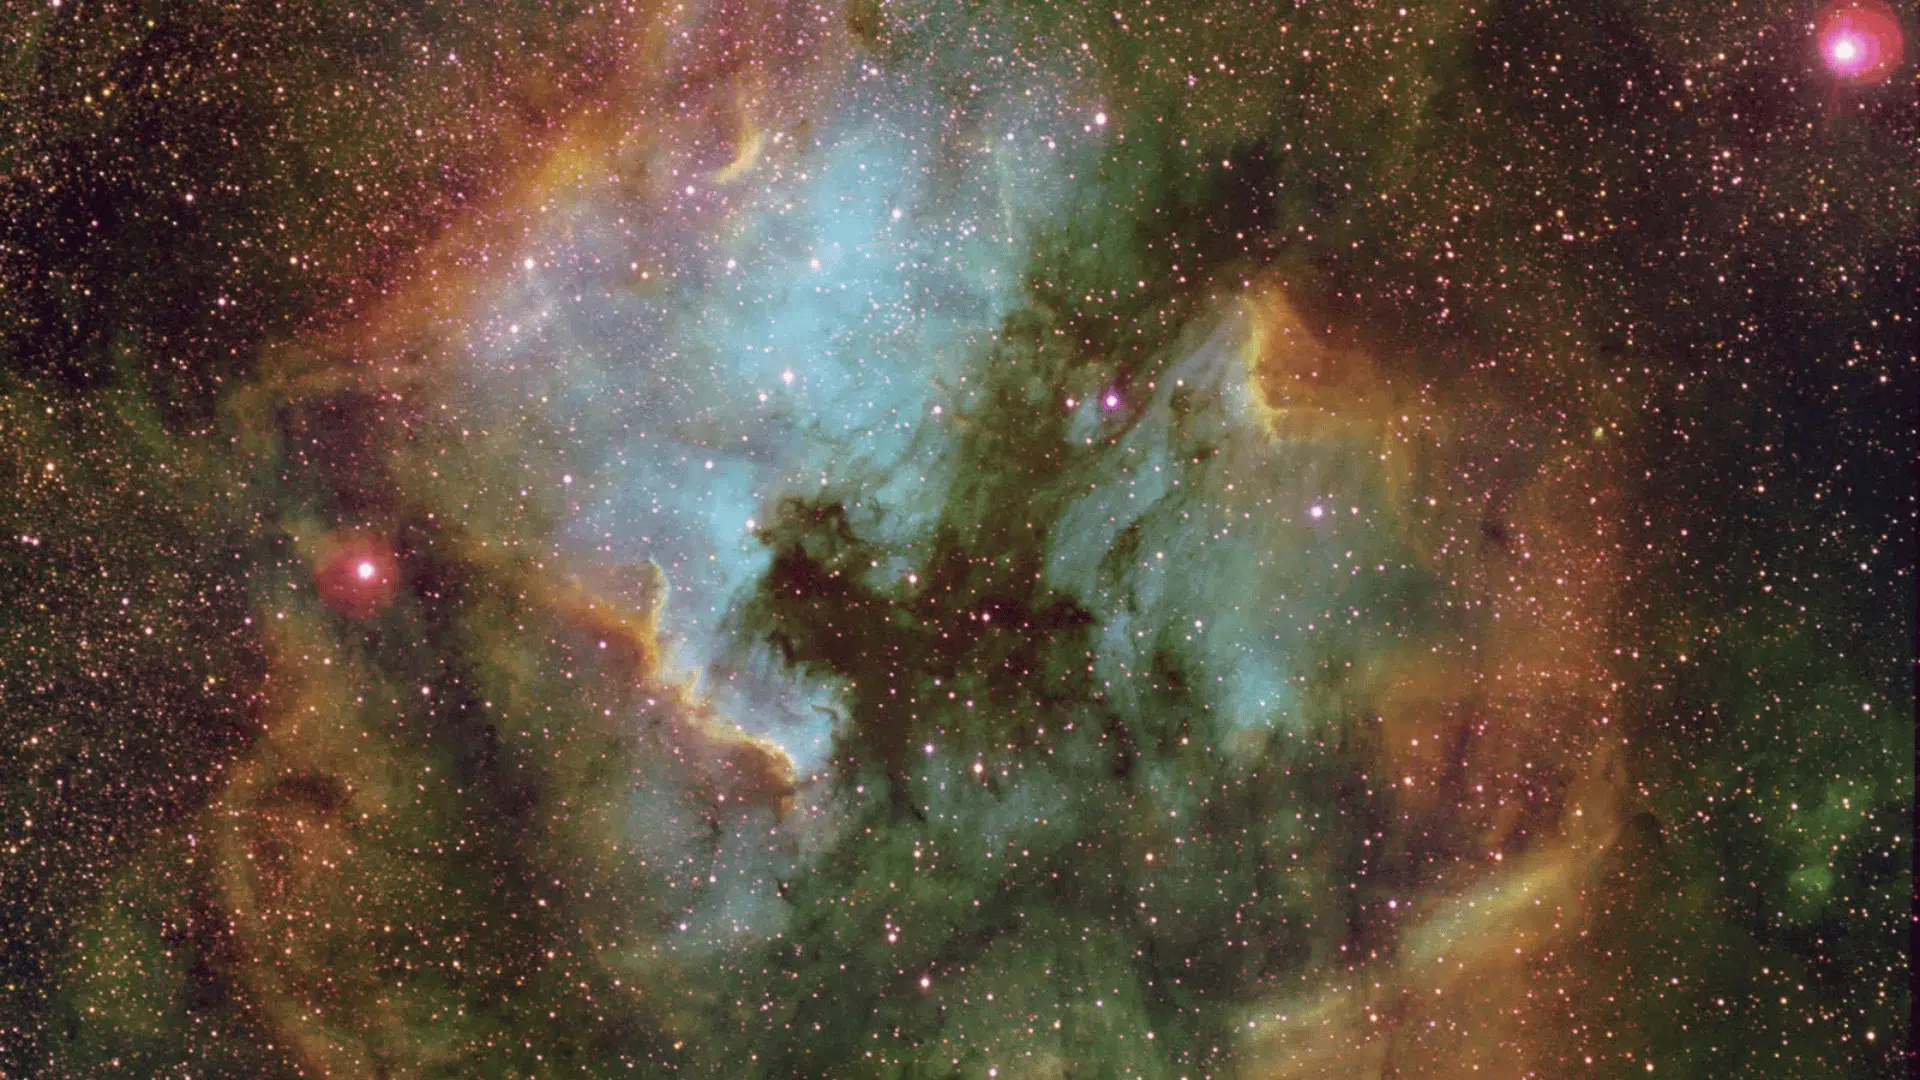
Image Source: britannica.com
These unique characteristics make it an ideal target for both beginner and experienced astrophotographers seeking beautiful results.
1. Large Angular Size: This nebula covers a huge area in the night sky, making it perfect for wide-field photography setups. Photographers can capture the entire nebula using regular camera lenses instead of expensive telescopes.
2. Bright Hydrogen Emissions: This nebula glows brightly in hydrogen-alpha light, creating red colors that show up beautifully in photographs. The strong emissions make it easier to capture than many fainter deep-sky objects.
3. Easy to Locate: Located near the bright star Deneb in Cygnus, it is simple to find it in the night sky. This proximity to a well-known star helps beginners find the target quickly.
4. Beginner-Friendly Target: The nebula’s brightness and size make it forgiving for new astrophotographers learning proper techniques. Mistakes in tracking or exposure settings are less likely to ruin the final image.
5. Distinctive Shape: Its recognizable continent-like shape creates instant visual appeal in photographs. Viewers immediately understand what they’re looking at, making images more engaging and shareable.
6. Great for Different Equipment: Whether using basic DSLR cameras or advanced telescopes, this nebula produces excellent results across various equipment levels, making it accessible to all photographers.
How to Photograph the North America Nebula: Complete Process
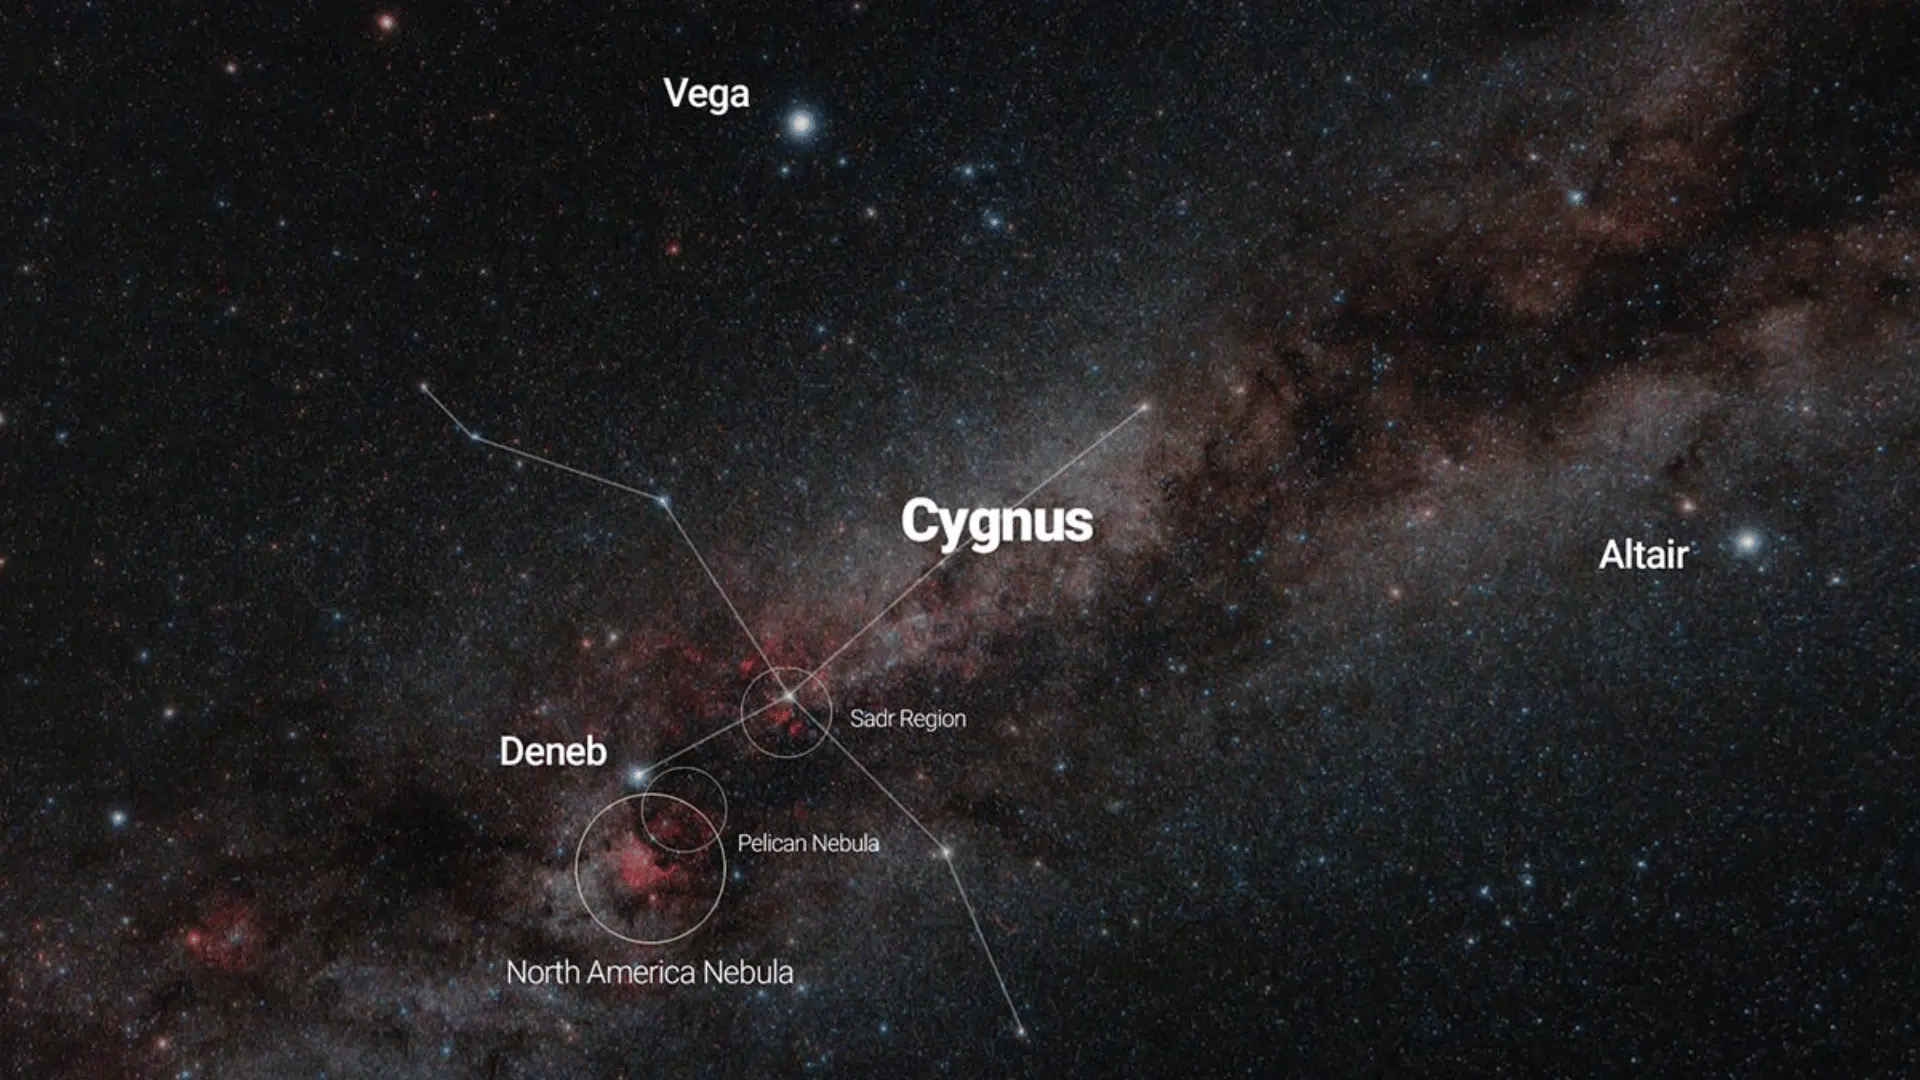
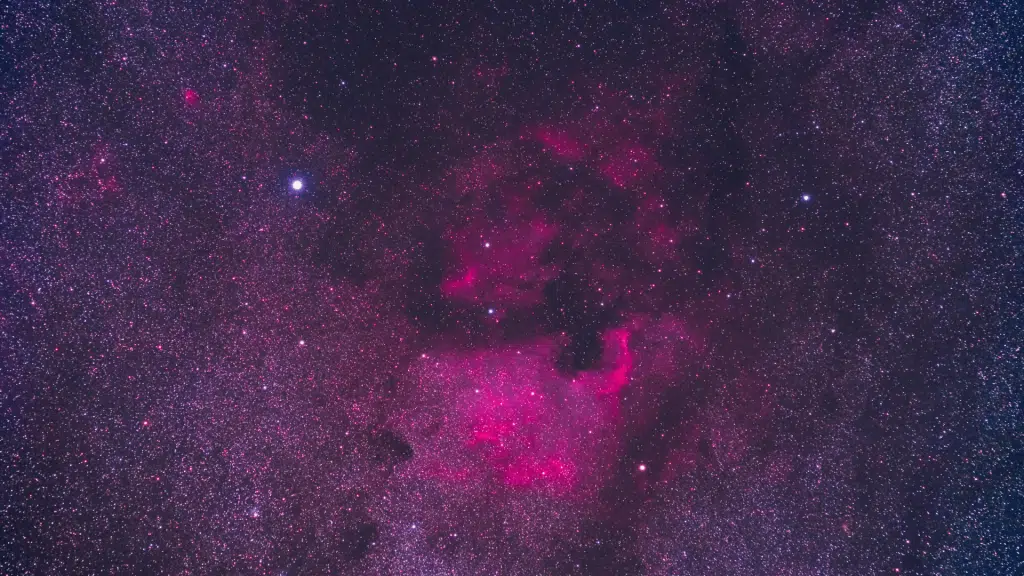
Image Source: astrobackyard.com
This step-by-step process reads through every stage from initial planning to final image processing for professional-quality results:
Step 1: Plan Your Shooting Session
Check when the Cygnus constellation is highest in the sky during June through September for northern hemisphere observers.
Use planetarium software like Stellarium to determine optimal timing for your location. Plan your shoot around new moon phases for the darkest skies possible.
Choose a location far from city lights with minimal light pollution for best results. Dark sky sites significantly improve nebula visibility and image quality.
Step 2: Set Up Your Equipment
Mount your camera on an equatorial mount with motorized tracking capabilities for long exposures.
Attach a lens in the 100-400mm range, with 135mm being particularly popular for this target. Perform polar alignment carefully to ensure accurate tracking during extended imaging sessions.
Connect any autoguiding systems if available for precise tracking. Proper setup prevents star trailing and ensures sharp images throughout the night.
Step 3: Locate and Frame the Target
Find the bright star Deneb in the Cygnus constellation to help locate the North America Nebula nearby. Use your camera’s live view or finder scope to center the nebula in your frame accurately.
Consider including the nearby Pelican Nebula in your composition for a more complete image.
Take test shots to verify framing and focus before starting your main imaging sequence for the session.
Step 4: Achieve Perfect Focus
Switch to live view and magnify a bright star near the nebula for focusing. Adjust focus until the star appears as a sharp pinpoint of light without halos.
Take several test images to confirm focus accuracy before proceeding with imaging. Use a Bahtinov mask if available for more precise focusing results.
Lock the focus position to prevent accidental changes during the shooting session that could ruin images.
Step 5: Configure Camera Settings
Set your camera to manual mode and shoot in RAW format for maximum flexibility. Start with ISO 1600-3200, depending on your camera’s noise performance characteristics.
Use exposure times between 2 and 5 minutes to avoid star-trailing issues. Set white balance to daylight or auto for consistent results.
Turn off image stabilization and in-camera noise reduction features that can interfere with stacking.
Step 6: Capture Your Images
Take 20-50 individual exposures of the nebula for later stacking and processing. Capture dark frames with the lens cap on using the same exposure settings.
Take flat field images for vignetting correction if possible during your session.
Monitor your images periodically to ensure tracking accuracy and focus remains sharp throughout the entire session. Consistent monitoring prevents wasted time on unusable images.
Step 7: Process and Stack Your Data
Use software like DeepSkyStacker or PixInsight to align and combine your multiple images effectively.
Apply dark frame and flat field corrections to improve overall image quality significantly.
Improve the nebula’s red hydrogen emissions through careful color adjustments and processing techniques.
Fine-tune contrast, brightness, and noise reduction to create your final beautiful image of this cosmic wonder for sharing
Equipment and Setup Required for The Shoot
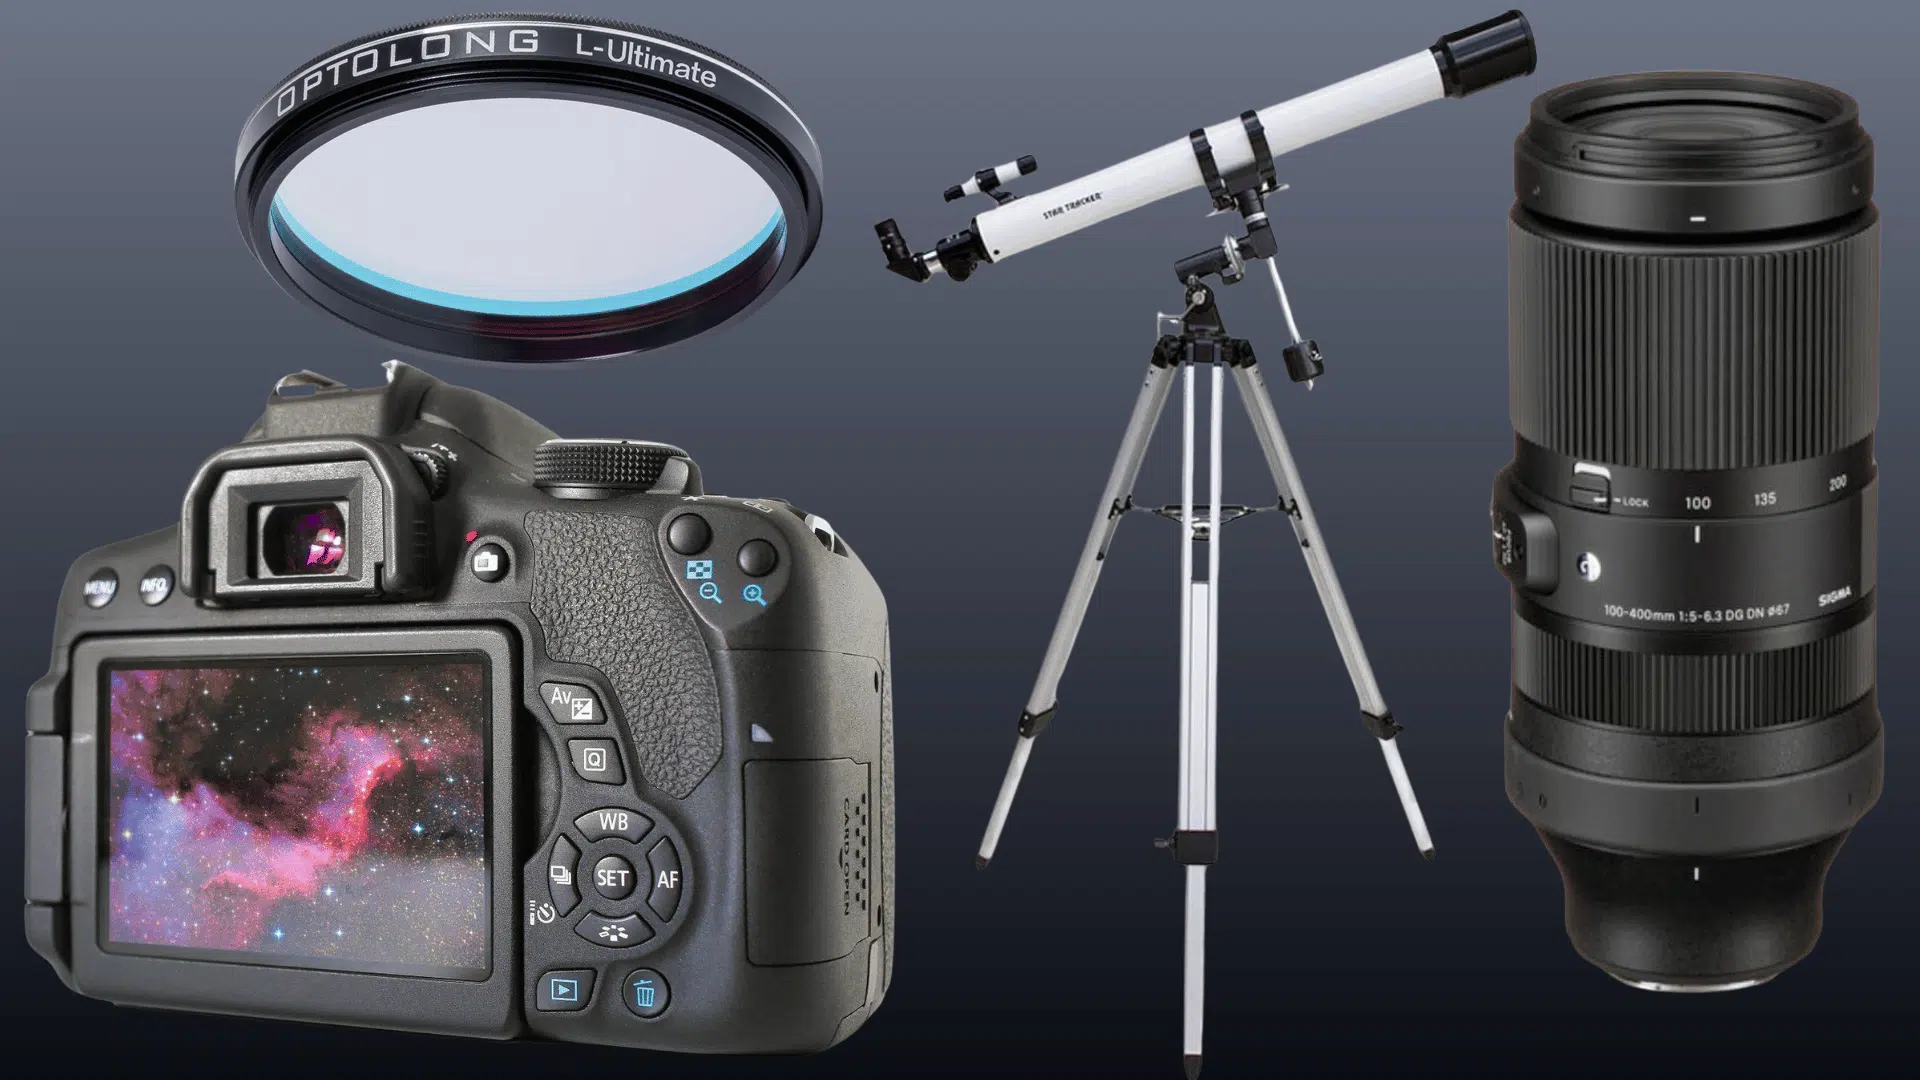
Photographers need several key pieces of gear to succeed. The setup can range from beginner-friendly to advanced professional systems.
Let me break down what equipment works best for shooting nebulae and other celestial targets.
Cameras & Sensors
The camera choice depends on experience level and budget. Different sensors capture light in unique ways.
- DSLR/Mirrorless (unmodified): Standard cameras work well for beginners who are just starting their astrophotography journey
- Modified astro cameras: These offer enhanced sensitivity to hydrogen-alpha emissions, revealing more nebula details
- Monochrome setups: Advanced option for maximum detail and flexibility, though it requires more processing work
Lenses & Telescopes
Focal length determines how much of the sky appears in each frame. Shorter lenses capture wider views.
- Wide-field lenses (100-400mm): The 135mm prime lens is a particularly popular choice among astrophotographers
- Small refractors: Short focal length telescopes capture the entire nebula without cutting off edges
- Longer focal length: Captures fine details and close-up views, but may cut nebula edges from the frame
Mount & Tracking
A solid mount is essential for sharp images. It compensates for Earth’s rotation during long exposures.
- Equatorial mount: Motorized tracking is essential for long exposures that last several minutes
- Star tracker: Lightweight option for camera lens setups, perfect for travel astrophotography
- Polar alignment: Critical for accurate tracking during long sessions under the stars
- Guiding system: Autoguider or off-axis guider for precision tracking that eliminates star trails
Filters
Filters help isolate specific wavelengths of light. They reduce unwanted interference from light pollution.
- Hydrogen-Alpha (Ha): Isolates nebular emissions for enhanced contrast, making red nebulae pop
- Light pollution filters: Reduce urban sky glow interference from nearby cities and streetlights
- Dual/Multi-band filters: Captures multiple wavelengths simultaneously, saving imaging time
- Narrowband filters: Advanced filtering for specific emission lines like OIII and SII
Expert Tips for Capturing the North America Nebula
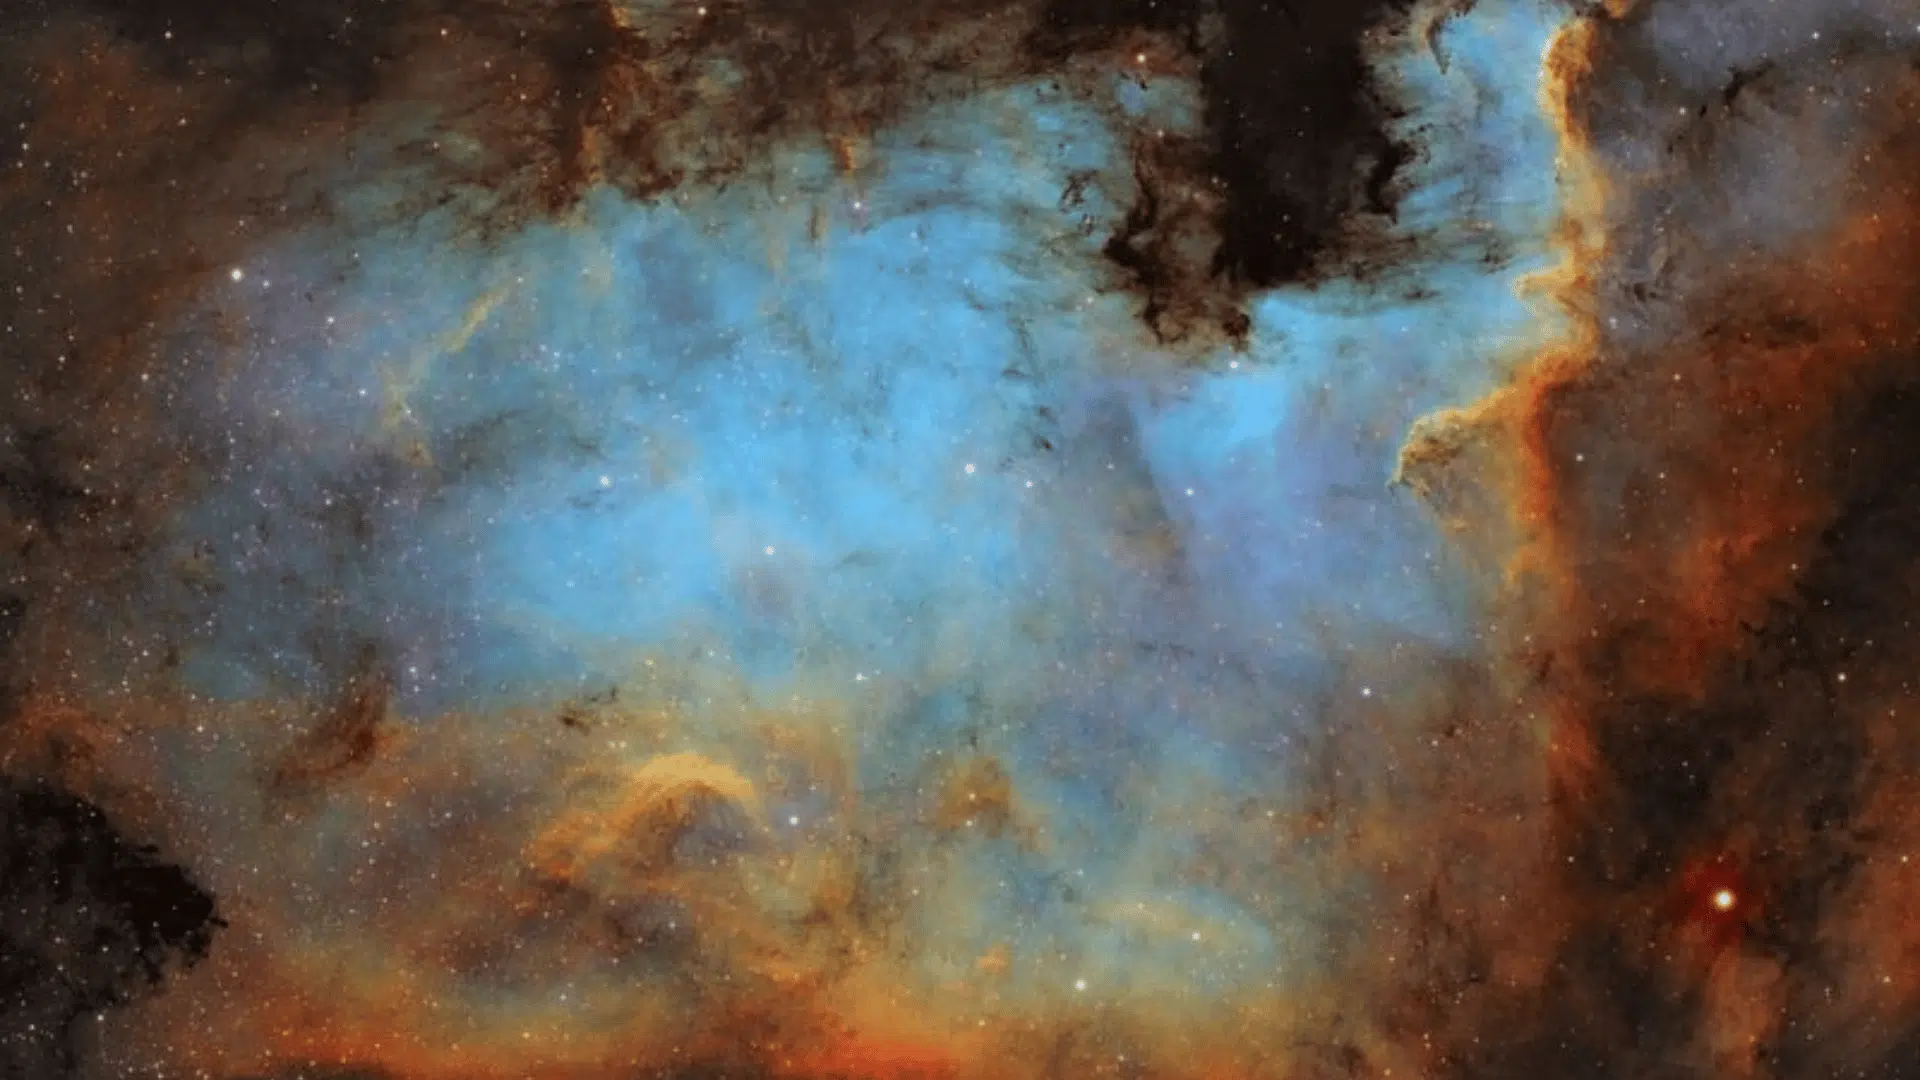
Image Source: cosmobc.com
Following these expert strategies can improve your results and take your astrophotography to the another level.
1. Begin with 2-3 minute exposures to test your polar alignment and avoid star trailing. Gradually increase exposure times as your tracking improves.
2. Use live view and magnify bright stars like Deneb to achieve perfect focus before imaging. Poor focus ruins nebula details completely.
3. RAW files preserve much more data than JPEGs, giving you greater flexibility during post-processing and better final image quality.
4. Capture calibration frames to remove noise and vignetting from your images. These significantly improve your final stacked image quality.
5. Accumulate 3-6 hours of total exposure time across several nights for spectacular results with rich detail and vibrant colors.
6. Use astrophotography software like DeepSkyStacker to combine exposures. Proper stacking reduces noise while preserving delicate nebula structure.
Conclusion
The North America Nebula stands as one of the most rewarding targets for astrophotographers at any skill level.
Each session brings new improvements to your astrophotography capabilities. Don’t wait for perfect conditions or expensive equipment to begin.
Step outside on the next clear night, aim your camera at Cygnus, and start creating your own breathtaking photographs of the Nebula today!