


CCTV cameras are an important part of modern security systems. They prove to be an effective solution in keeping your places safe from theft and unauthorized access.
Correct CCTV camera installation can monitor activities and provide you with peace of mind. But understanding the types, the installation process, the cost, etc., can be quite a challenging task.
This post provides a step-by-step installation process and security camera installation costs, so you can plan a security system that works best for you.
Types of CCTV Cameras
If you are looking for a secure setup, then the first step is choosing the right camera types, depending on the place and the budget.
| Camera type | Description | Best for |
| Dome Cameras | Dome-shaped cameras that are typically ceiling-mounted. | Indoor spaces such as offices and stores. |
| Bullet Cameras | Long, cylindrical cameras that are usually wall-mounted. | Outdoor areas such as entrances and driveways. |
| IP (Network) Cameras | Wired or wireless cameras that connect to the internet for remote access. | Homes and businesses require remote monitoring. |
| Wireless Cameras | Cameras that operate over Wi-Fi and do not require extensive cabling. | Quick installations and homes with limited wiring. |
| PTZ (Pan-Tilt-Zoom) Cameras | Advanced cameras that can rotate, tilt, and zoom to cover large areas. | Large spaces such as parking lots, warehouses, and campuses. |
Stepwise CCTV Camera Installation Process

The correct installation of CCTV is very important to make your security systems work efficiently. Follow these steps to install it perfectly.
1. Plan Your Layout
The first step is deciding where you want your camera to be placed. A proper analysis of the place helps identify areas that require the highest level of surveillance.
Entrances and parking lots are among the most common locations for CCTV camera installation. Ensure that cameras are positioned to capture clear footage of people entering and exiting the premises
Additionally, you can cover back doors, off-street windows, blind spots, or high-risk areas with CCTV cameras.
2. Choose the Right Cameras
Once you have decided on the location for the camera installation, the next step is to choose the right camera.
It is important to choose a CCTV camera that suits your monitoring needs and environment. Consider factors such as image quality, night vision capability, field of view, and storage requirements before making a decision.
You can choose the camera type based on the area, whether you want indoor or outdoor, or whether you want wired or wireless.
3. Gather Tools and Equipment
After completing the first two steps, it’s time to gather all your tools and equipment. Having everything ready before starting ensures the installation process goes smoothly and efficiently.
It also helps prevent unnecessary interruptions once you begin. Cameras, cables, a drill, screws, mounts, and a power supply are everything you need for CCTV camera installation.
Additionally, you may need a ladder, a cordless drill, screwdrivers, and pliers. Make sure these items are available before you start the install.
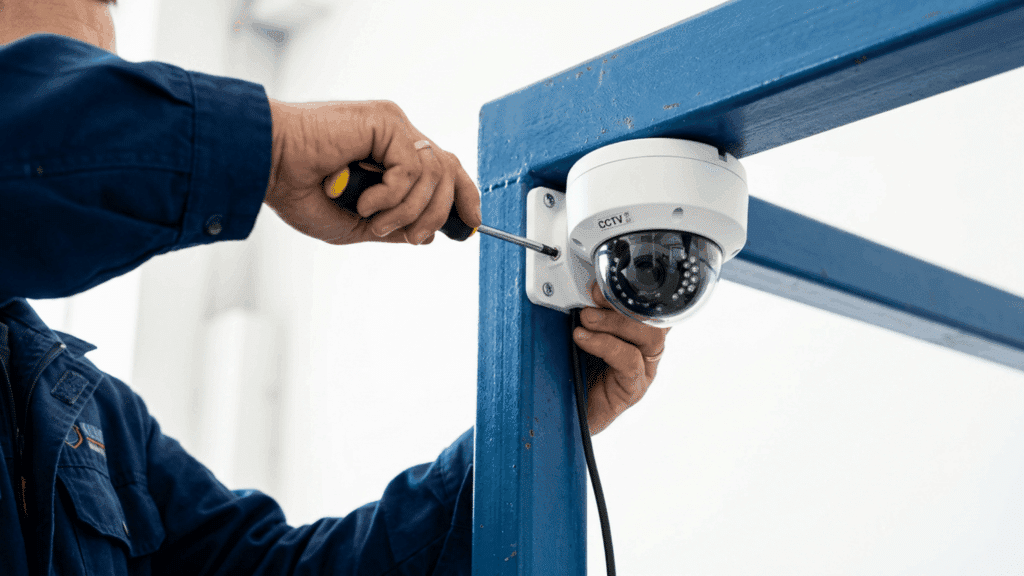
4. Mount the Cameras
Selecting a sturdy spot to attach the camera base is the next step in the installation process.
Keep in mind that cameras should always be mounted approximately 8–10 feet off the ground to help prevent tampering while still capturing clear footage.
While mounting the camera, keep in mind the lighting and the optimal viewing angle. Make sure the mounting surface is strong enough to support the camera and protect it from vibrations or movement.
5. Connect to Power and Network
The next step in the installation process is connecting to power and the network. Ensuring proper connections at this stage is crucial for the cameras to function reliably.
Double-checking connections now can prevent troubleshooting issues later. If using a wired system, plug in the cameras and double-check that all the cables are securely connected.
Make sure the power supply is working properly. In the case of a wireless system, connect the camera to the wifi or the network. Check the signal strength to ensure a stable connection.
6. Adjust Camera Angles
After the installation, it is very important to adjust the camera angles for better security. Take a moment to walk around the property and visualize the coverage from each camera’s perspective.
Cover the key areas on the CCTV cameras, such as the main doors, back doors, and parking areas. Ensure that the camera captures a clear and wide view of the area.
Check for optimal viewing without any obstacles. Adjust the angle to minimize blind spots and improve coverage.
7. Test and Monitor
Now the last step in the camera installation process is to test and monitor the CCTV camera.
You have to cross-check every camera to make sure it covers every critical spot clearly. Verify that the video quality, recording, and network connection are working properly.
Test features such as night vision, motion detection, and remote viewing, if available. Keep checking the cameras at regular intervals to make sure they function properly.
Understanding Security Camera Installation Cost
The installation cost can vary depending on several factors. Before installing a camera, understanding the cost and the factors that determine it is crucial.
| Factor | Details |
| Type of Camera | Wired: $100-$300 (requires expert installation); Wireless: $50-$250 (simple installation). |
| Number of Cameras | More cameras increase the cost. Small space: 2 cameras; Large space: 6-8 cameras. |
| Installation Complexity | Hard-to-reach spots or long cables increase cost. DIY is cheaper; a professional ensures a flawless setup. |
| Storage Options and Extra Features | Higher storage increases cost. Cloud storage monthly fee. Night vision, motion alerts, and high resolution add cost |
| Average Setup Cost | Small setup: 2 cameras, $200-$1000; Large commercial setup: 8-16 cameras, $1000-$5000. |
Security Camera Maintenance Tips
Keeping your CCTV cameras in top condition is essential for reliable security. Regular maintenance ensures clear footage, uninterrupted operation, and long-lasting performance.
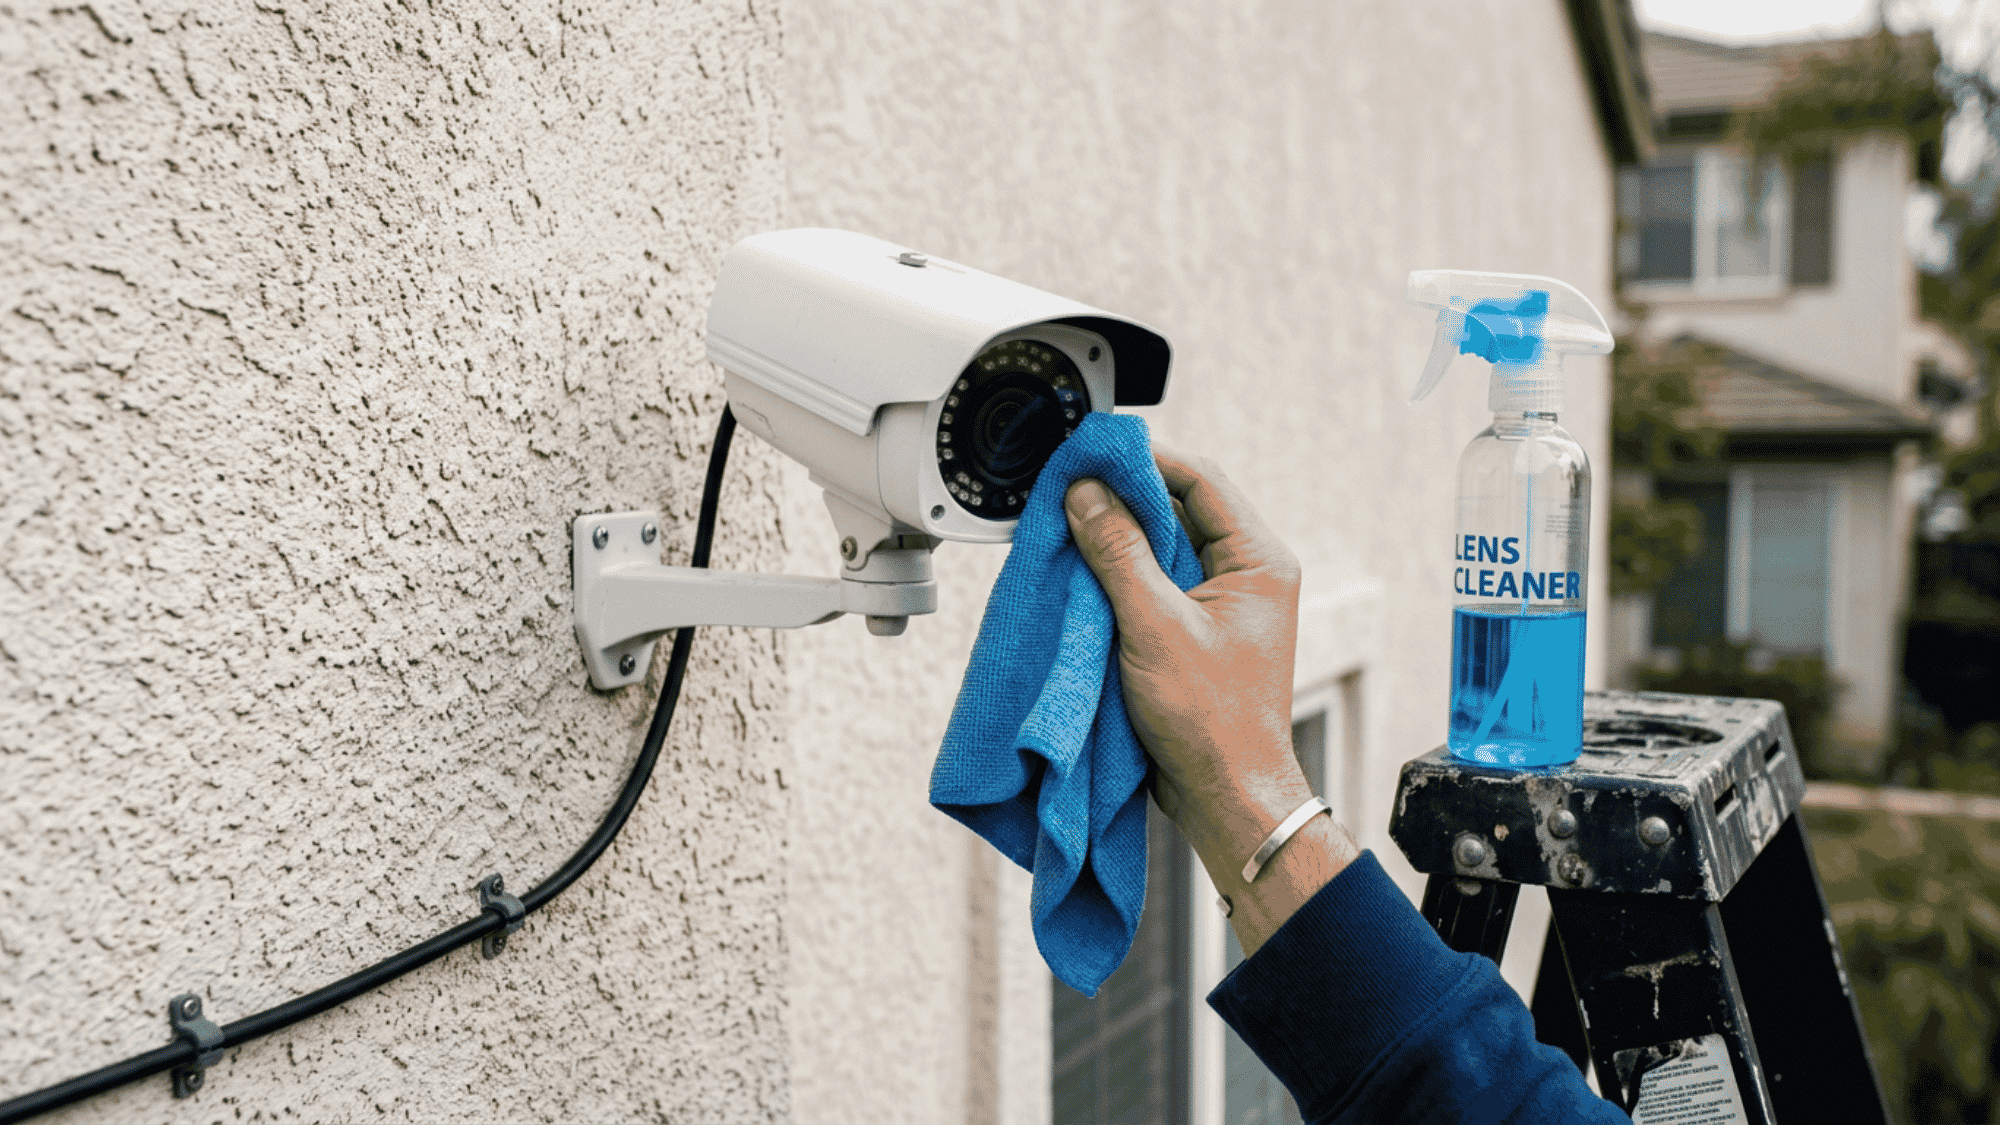
1. Clean the Lenses Regularly: Make sure you keep the lenses clean. Use a soft cloth or lens cleaning solution to remove dust, dirt, or water spots. Avoid harsh chemicals that can damage the lens.
2. Check cable connections: Keep a regular check on the cables. Inspect power and network cables for wear or loose connections. Secure any exposed wires to prevent accidental disconnection.
3. Test camera angles: Don’t forget to check the camera angles regularly. Verify that all cameras are covering the intended areas. Adjust angles if furniture, plants, or new objects block the view.
4. Update firmware and software: Keep the dvr/nvr system and camera firmware up to date. Update apps or software used for remote monitoring.
5. Inspect power supply: Ensure uninterrupted power to cameras and backup systems. Check-ups or battery backups, if installed.
Conclusion
CCTV camera installation can help protect your space and give you peace of mind.
By choosing the right camera, planning the layout, and executing the installation process, you can maximize the coverage and improve overall safety.
Follow this step-by-step camera installation process to create a reliable and effective security system.
With proper planning and installation, you can ensure better surveillance, enhanced protection, and long-term peace of mind.
Frequently Asked Questions
Are Wireless Cameras Reliable?
Wireless cameras depend on wi-fi connections. In areas with poor network coverage, wired cameras are more reliable.
How to Maintain a CCTV Camera?
For proper maintenance, clean the lenses regularly, check the cables and connections, and test the cameras at regular intervals.
Do CCTV Cameras Work at Night?
Only CCTV cameras that have night vision work at night. Other cameras will not have clear footage.
How to Access CCTV Footage?
Most of the CCTV cameras nowadays come with remote viewing options on a mobile app or a web browser.