


Most people think one or two screens are enough. And for a while, that feels true. But then the tabs pile up.
The windows stack on top of each other. Switching back and forth starts eating up more time than the actual work does. That’s a frustrating spot to be in, especially when deadlines are close, and focus keeps slipping.
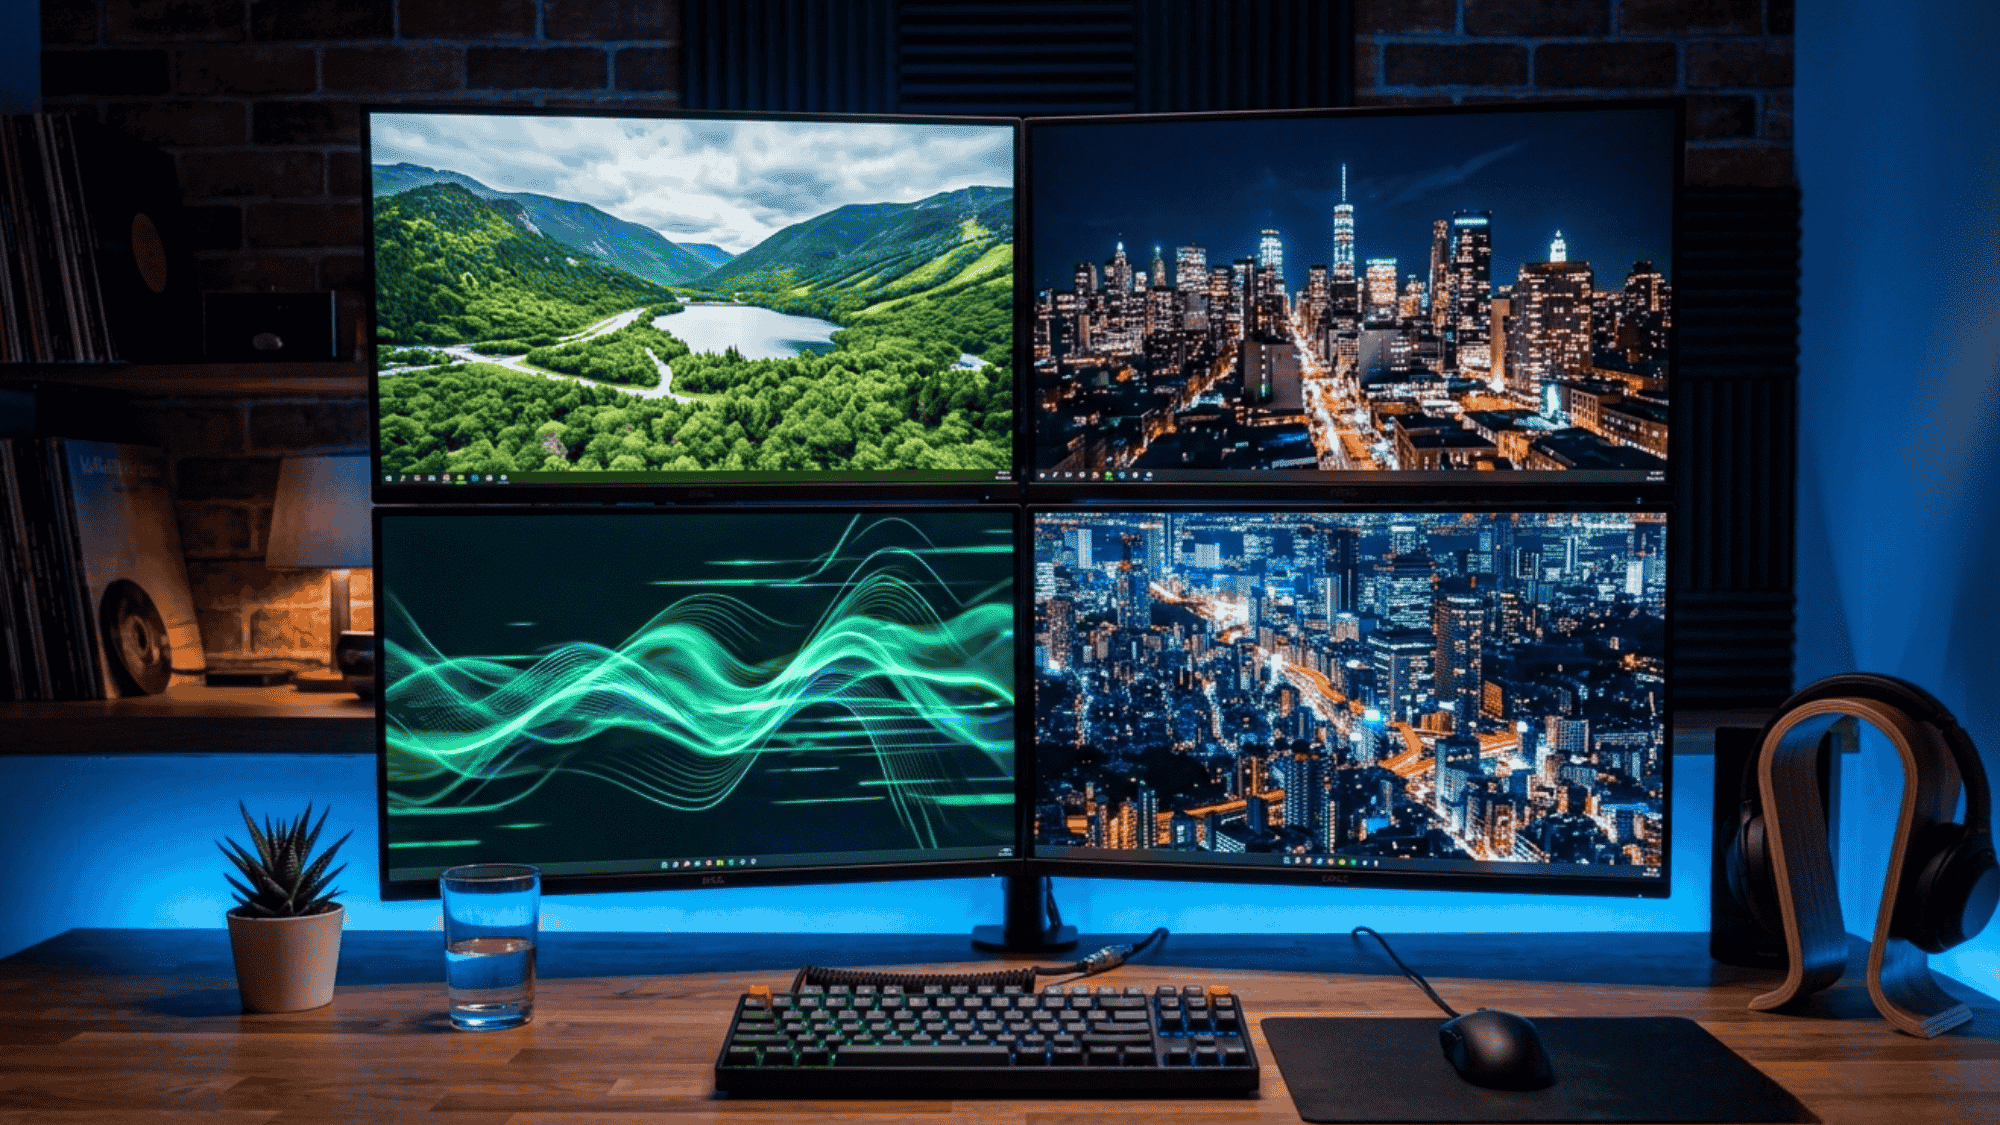
A four-monitor setup changes how a workspace works. It gives every task its own space and keeps everything in view at once.
No more hunting through minimized windows or losing track of what was open. Setting it up the right way, though, takes a few key steps.
What is a 4 Monitor Setup and Who Needs It?
A 4-monitor setup connects four screens to one computer. It gives users a much bigger workspace to handle multiple tasks at once. No more constant window-switching or stacking apps on top of each other.
It works best for people with heavy, data-driven workflows.
Financial traders, software developers, video editors, and data analysts use it the most. Each screen holds a different tool, reference, or task, all visible at the same time.
Multi-monitor setups can boost productivity by 20–50%. That said, the real benefit depends on how the workflow is structured.
Benefits of a 4 Monitor Setup for Productivity and Workflow
Running four monitors changes how work gets done. Every task gets its own screen, and nothing gets buried under a pile of windows.
- Expanded Workspace: Keep the main task, references, tools, and communications visible on separate screens at all times.
- Better Multitasking: Drag and drop between apps, cross-reference documents, and monitor background processes without breaking focus.
- Reduced Window Switching: No more alt-tabbing through stacked windows — everything stays in plain sight and within reach.
- Flexible Task Separation: Dedicate one screen to calls or research, another to the main project, and others to notes or media.
- Improved Efficiency: Comparing spreadsheets, editing with tool palettes open, or tracking live data becomes faster and less tiring
Stepwise Instructions on How to Set Up 4 Monitors
Setting up four monitors does not have to be complicated. Follow these steps in order, and the whole process stays straightforward.
Step 1: Check Hardware Compatibility
The first thing to do is check the graphics card (GPU). It needs at least four video output ports: HDMI or DisplayPort.
Many modern GPUs support four or more displays.
Older systems or laptops with integrated graphics may fall short. In that case, adding a dedicated graphics card or a USB-C docking station with DisplayLink support solves the problem.
Step 2: Choose the Right Equipment
Pick four monitors that match in size and resolution.
Similar displays make alignment much cleaner and easier on the eyes. Grab the right cables too: HDMI 2.0 or DisplayPort cables work best for higher resolutions.
Thin-bezel monitors are a solid choice here since they reduce visual breaks between screens.
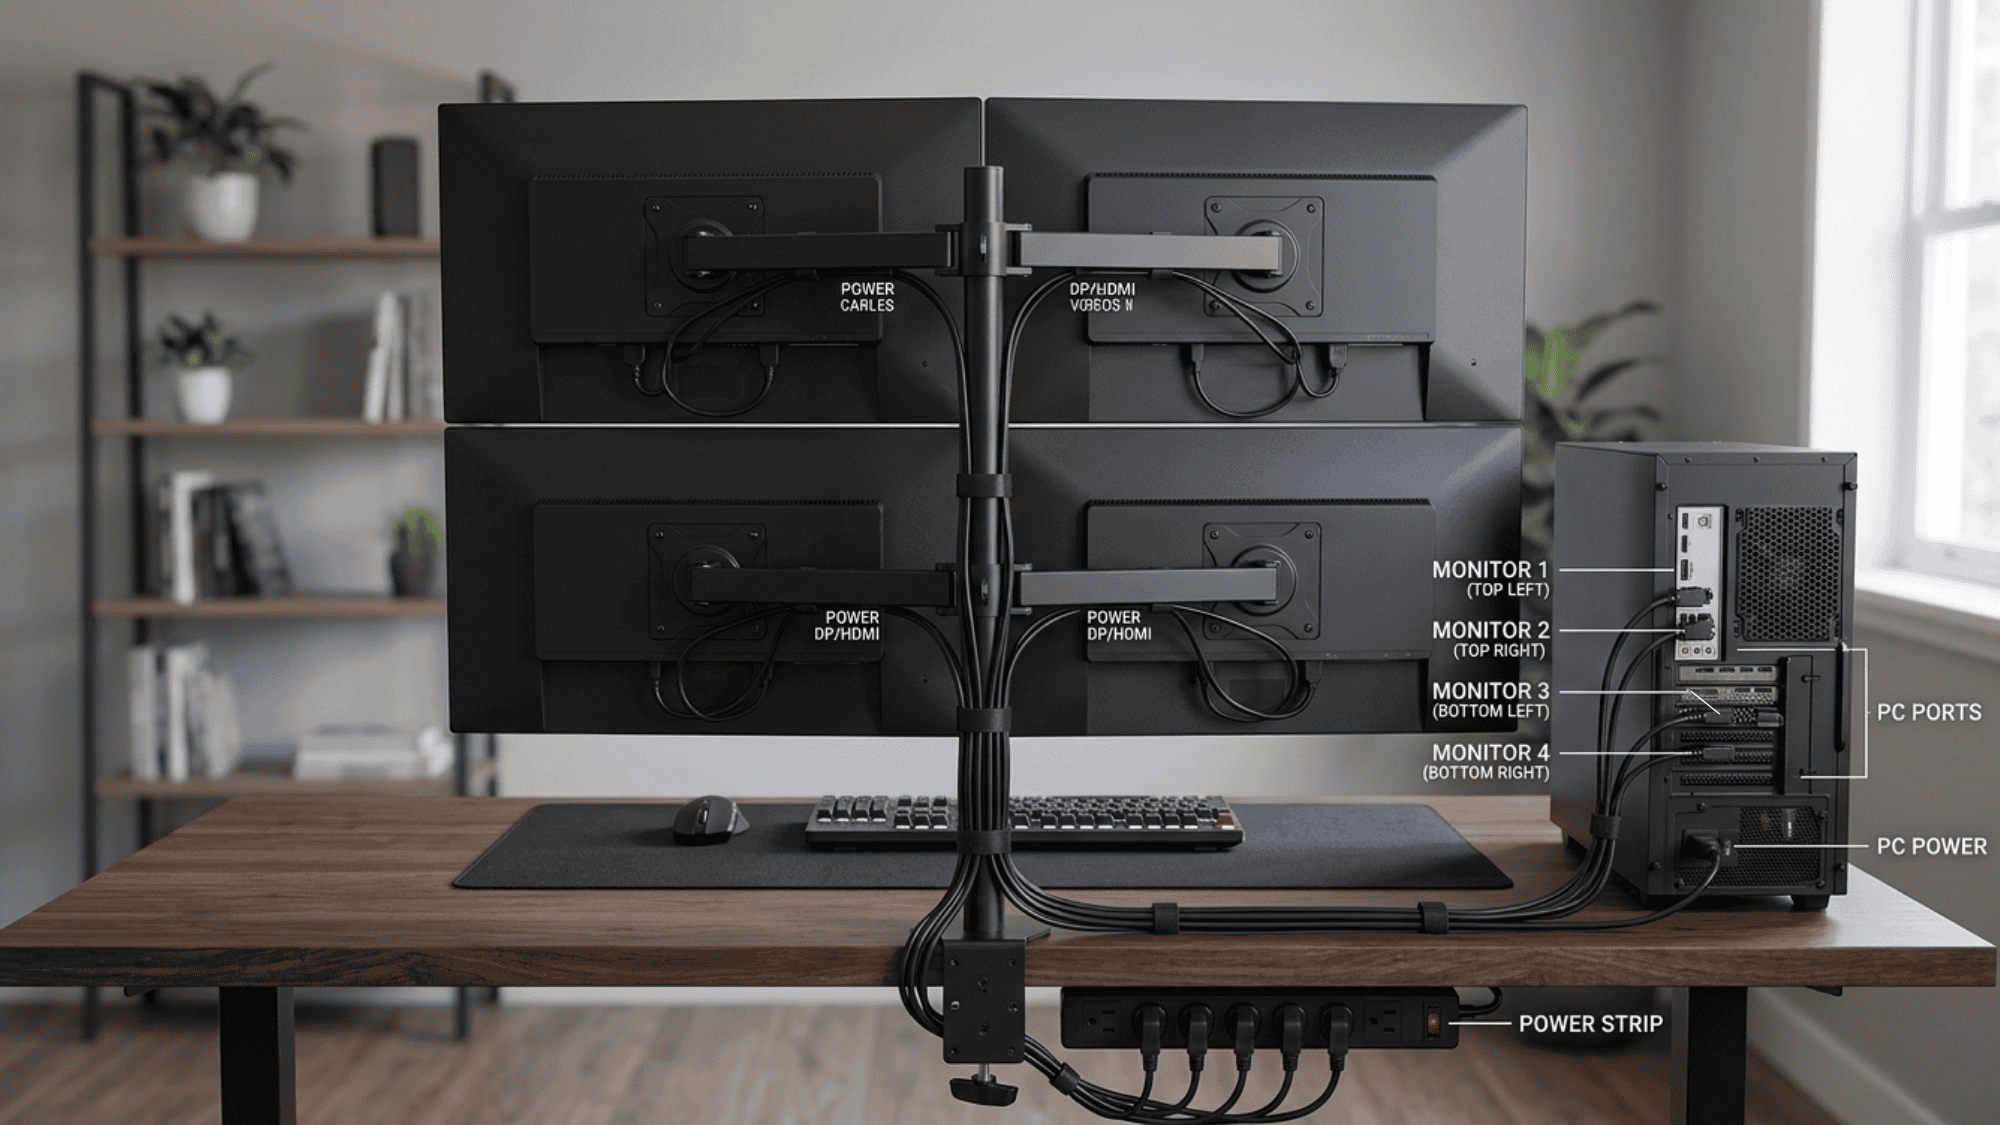
Step 3: Connect the Monitors Physically
Power the computer off before plugging anything in. Connect each monitor to a video output port using the correct cable. Then plug each monitor into a power source.
Keeping cables organized from the start saves a lot of hassle later. A cable management sleeve or velcro ties help keep things tidy.
Step 4: Configure the Display Settings
Power everything on and head into display settings.
On Windows, right-click the desktop and open Display Settings. Detect all four monitors, drag the icons to match the physical layout, and select “Extend These Displays.”
On macOS, go to System Settings, then Displays, and arrange the screens in extended mode. Set one screen as the main display.
Step 5: Adjust and Fine-Tune the Setup
Once all four screens are detected, align the edges so the mouse moves smoothly between them.
Set the correct resolution and refresh rate for each monitor individually.
Update GPU drivers if anything looks off. Then test by moving windows across all four screens and check for flickering, blurriness, or any detection issues.
Best 4 Monitor Setup Layouts for Ergonomics and Comfort
The way four monitors are arranged matters just as much as the setup itself. The right layout protects posture and reduces strain.
| Layout | Description | Best For |
|---|---|---|
| Standard Quad (2×2 Grid) | Two monitors on the bottom row, two on top | Balanced viewing with smaller 24–27″ screens |
| 3-Across + 1 on Side or Top | Three screens in a row with a fourth mounted on the side or above | Reducing extreme head turning |
| Panoramic or L-Shaped | Monitors spread in a wide arc or across an L-shaped desk | Large desk setups with a centered primary screen |
| Command Center or Surround | Primary screen straight ahead, others angled inward at 15–30° | Control room-style monitoring workflows |
| Vertical Duals + Landscape | Two screens in portrait mode combined with two in landscape | Coding, documents, and data-heavy tasks |
The primary monitor should always sit directly in front at eye level. A full 2×2 grid forces constant up-and-down gazing, which adds neck strain over time.
Ergonomic Tips for a Comfortable 4 Monitor Setup
Four screens can do a lot of good, but only if the setup does not cause neck, back, or eye strain.
- Positioning: Place the primary monitor at arm’s length, roughly 20–30 inches away. The top of the screen should sit at or just below eye level.
- Angles: Tilt side monitors inward at 15–30° so they face directly. Outer screens should only be used for quick glances, not constant viewing.
- Height and Alignment: Keep the top edges of all monitors level with each other. Monitor arms make height, tilt, and swivel adjustments much easier to manage.
- Posture: Sit upright with feet flat on the floor. The chair should support the lower back. Take regular breaks using the 20-20-20 rule — every 20 minutes, look at something 20 feet away for 20 seconds.
- Lighting: Tilt screens slightly backward to cut down on glare. Keep monitors away from windows or direct light sources. Blue-light filter software like f.lux also helps during long sessions.
- Desk Space: Mount monitors on arms to free up the desk surface. Make sure the keyboard and mouse placement keep wrists in a neutral, comfortable position.
Essential Equipment for a 4 Monitor Setup
Getting the right equipment before starting saves a lot of time and trouble. Here is everything needed for a solid four-monitor setup.
1. Monitors
Four matching monitors make the biggest difference. Models between 24–32 inches with 1440p or 4K resolution work best. IPS panels offer better color and wider viewing angles. Thin bezels keep the visual gaps between screens minimal.
2. Graphics Card
The GPU needs at least four output ports: HDMI or DisplayPort. High-end cards handle 4K and high refresh rates without breaking a sweat. For older systems, adding a dedicated PCIe multi-monitor graphics card gets the job done.
3. Cables
Use HDMI 2.0, HDMI 2.1, or DisplayPort cables for the best results. Cheap or mismatched cables cause resolution drops and flickering. Always match the cable type to the monitor’s supported resolution and refresh rate.
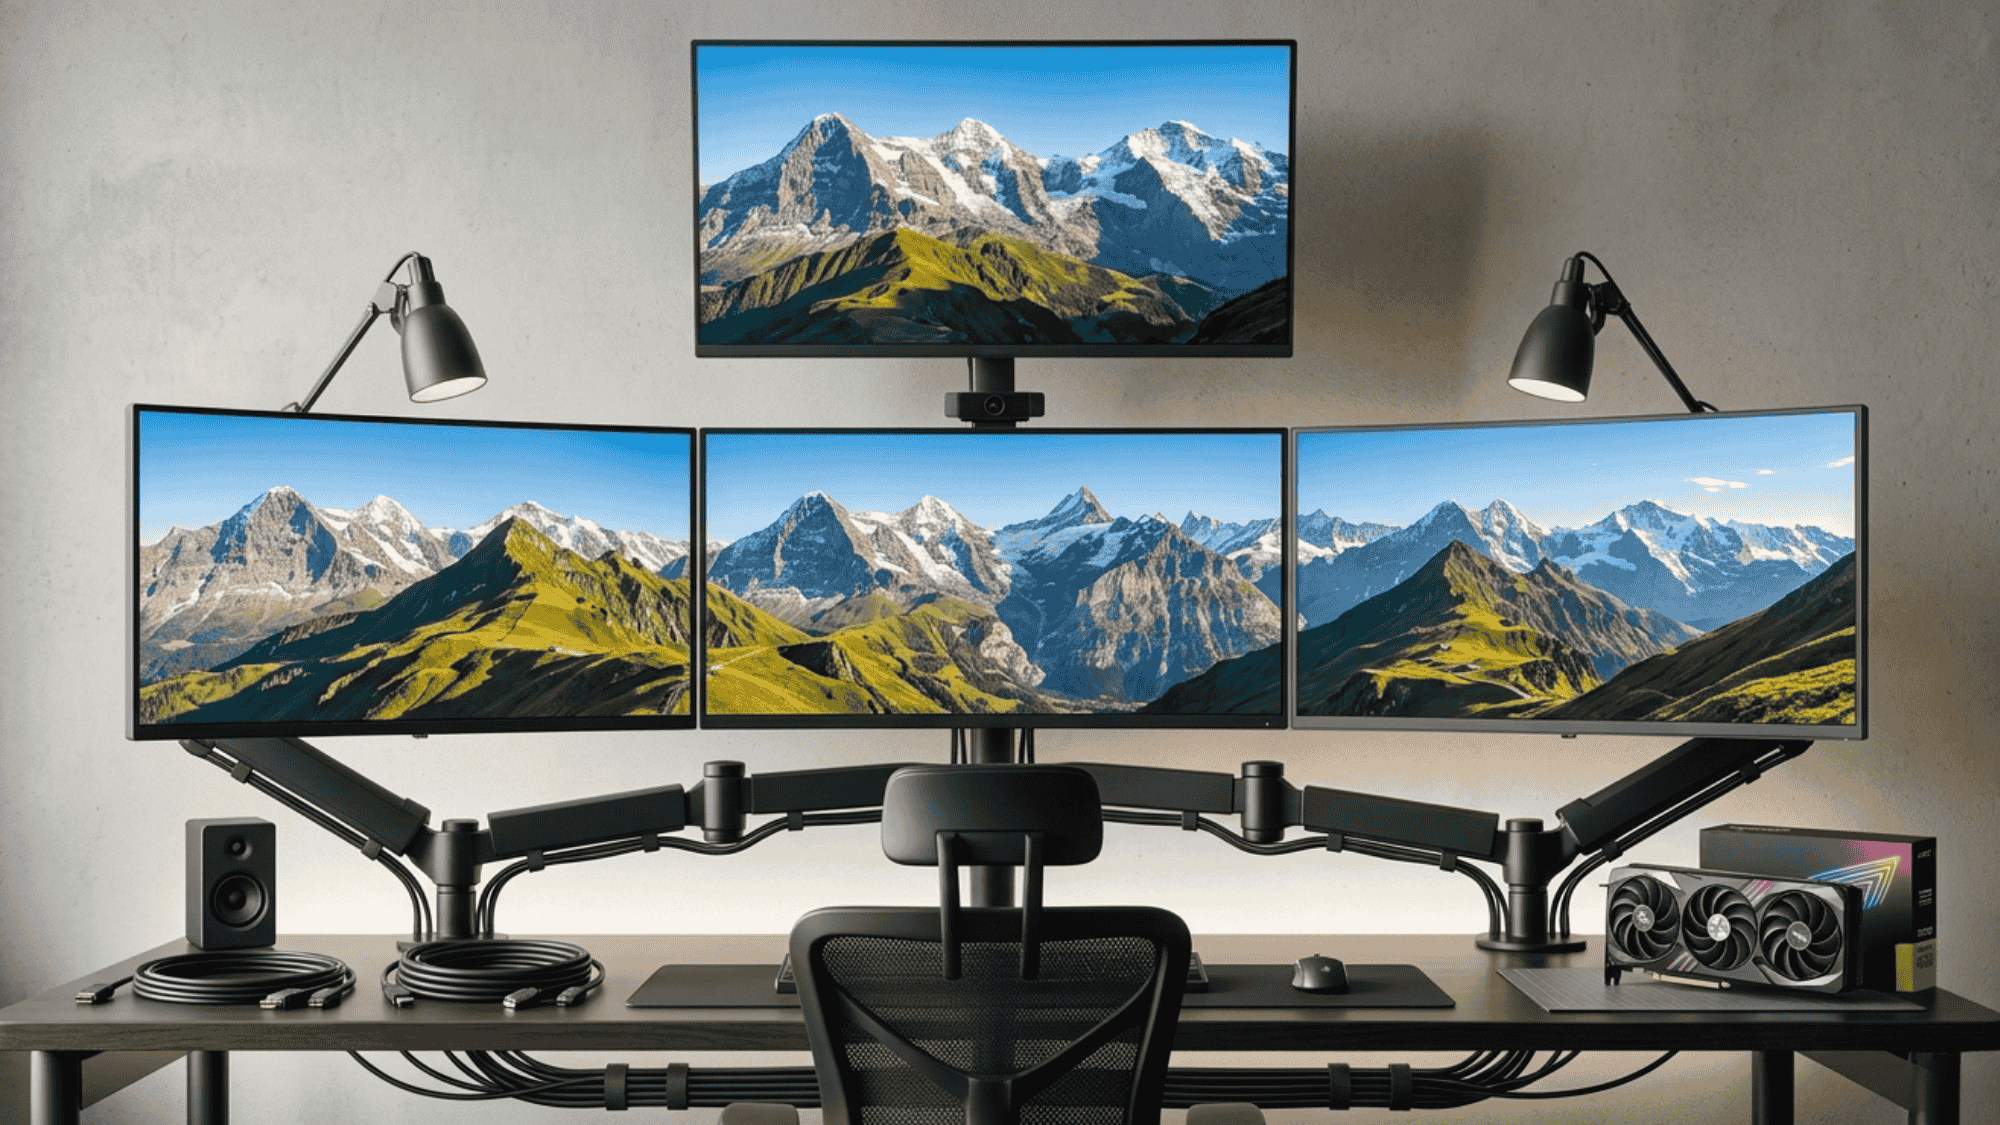
4. Monitor Mounts or Arms
A quad monitor arm or individual VESA mounts free up desk space and allow full adjustability. Most monitors use a 75×75 or 100×100 VESA pattern. Clamp or grommet bases keep the setup stable and clean.
5. Docking Station or Hub
Laptop users need a USB-C or Thunderbolt docking station that supports multiple displays. Not all docks handle four screens, so checking DisplayLink compatibility before buying saves a lot of frustration later.
6. Other Accessories
A surge-protected power strip handles the extra load from four monitors safely. Cable management sleeves keep the desk tidy. A KVM switch comes in handy for anyone switching between two computers on the same setup.
Common Problems and Fixes with 4 Monitor Setups
Four-monitor setups run into a few common issues. Most of them are easy to fix with the right checks in place.
| Problem | Possible Cause | Fix |
|---|---|---|
| Monitor Not Detected | Loose cable or outdated GPU drivers | Check all cables and ports, restart the PC, and update GPU drivers |
| Windows Jumping or Wrong Positioning | Incorrect monitor arrangement in display settings | Rearrange monitor icons in Display Settings to match the physical layout |
| Resolution or Scaling Issues | Native resolution not set per monitor | Set each monitor to its native resolution and adjust scaling individually |
| Flickering or Performance Lag | GPU under strain or poor-quality cables | Lower refresh rates or resolution, replace cables, and update drivers |
| Mouse Alignment Problems | Screens not aligned properly in settings | Adjust edge alignment in Display Settings and level monitors physically using arms |
| Cable Clutter or Power Issues | Too many cables without proper management | Use cable sleeves, ties, and a UPS or surge protector for stable power |
| macOS-Specific Display Quirks | Mission Control or Space settings conflict | Check display settings in macOS, disable “Displays have separate Spaces,” or use third-party window management tools |
4 Monitor Setup vs 3 Monitor Setup: Which is Better?
Choosing between a three-monitor and four-monitor setup comes down to one thing: the actual workflow.
A three-monitor setup works well for most people. It is simpler, cheaper, and easier to arrange without taking up too much desk space.
For general office work, coding, or content creation, three screens cover almost everything. The jump from two to three monitors brings the biggest productivity gain for most users.
A four-monitor setup makes more sense for traders, analysts, or anyone managing multiple live data feeds at once.
The extra screen adds real value only when the workflow genuinely demands it. Otherwise, it risks adding clutter rather than clarity.
Wrapping Up
A four-monitor setup works best when it is built around a real need. The right GPU, matching monitors, proper cable connections, and a well-thought-out layout all play a role in making it work smoothly.
Ergonomics matter just as much as the hardware. A setup that causes neck or eye strain ends up slowing things down rather than speeding them up.
Start small, if needed, check GPU compatibility first, then scale up. For traders, developers, and analysts, four screens can genuinely change how much gets done in a day.
Got questions about building the setup? Drop them in the comments below.